


All new Registrations are manually reviewed and approved, so a short delay after registration may occur before your account becomes active.
How to Setup your own VPN | The easy Way
 systemfreaks
Member, Patron Provider
systemfreaks
Member, Patron Provider

Introduction
VPN, or virtual private network, is a secure method of connecting remote internet resources together as if they were under the same LAN. OpenVPN is a popular implementation that works on Linux, Windows, and Mac operating systems and can be utilized to create complex, encrypted networks between physically dispersed servers.
The OpenVPN Access Server is a solution built on top of traditional OpenVPN that is used as a complete portal for managing connections, users, and interfaces. It provides the underlying VPN instance, a web interface for managing the suite, and a client that can be used within a web browser.
In this guide, we’ll install and configure the OpenVPN Access Server on a CentOS 6.9 VPS instance.
Why you need a VPN ?
A VPN server can be used to hide your real ip on your PC or Android Device, a VPN server can be used to create a secure network link when you connect to free or open wifi Hot Spots! So openVPN is very important for the your private data safety
First you need a VPS
You will need to buy a VPS to host your OpebVPN server , there are a lot of providers that offer fast VPS you can find few of them listed on the advertise section of Low end talk
Download and Install Packages
We can obtain the OpenVPN Access Server package for CentOS from the project’s website .
Right click on the package that matches your version of CentOS and your machine’s architecture. Select the “copy link address” item or whatever option is closest.
On your CentOS VPS , download the package with curl -O (that’s the letter “o” not a zero) followed by the URL you copied from the page. In my case, this turned out to be:
For Centos 7
yum -y install https://as-repository.openvpn.net/as-repo-centos7.rpm
yum -y install openvpn-as
For Centos 8
yum -y install https://as-repository.openvpn.net/as-repo-centos8.rpm
yum -y install openvpn-as
For Ubuntu 18
apt update && apt -y install ca-certificates wget net-tools gnupg
wget -qO - https://as-repository.openvpn.net/as-repo-public.gpg | apt-key add -
echo "deb http://as-repository.openvpn.net/as/debian bionic main">/etc/apt/sources.list.d/openvpn-as-repo.list
apt update && apt -y install openvpn-as
For Ubuntu 16
apt update && apt -y install ca-certificates wget net-tools gnupg
wget -qO - https://as-repository.openvpn.net/as-repo-public.gpg | apt-key add -
echo "deb [arch=amd64] http://as-repository.openvpn.net/as/debian xenial main">/etc/apt/sources.list.d/openvpn-as-repo.list
apt update && apt -y install openvpn-as
For Debian 10
apt update && apt -y install ca-certificates wget net-tools gnupg
wget -qO - https://as-repository.openvpn.net/as-repo-public.gpg | apt-key add -
echo "deb http://as-repository.openvpn.net/as/debian buster main">/etc/apt/sources.list.d/openvpn-as-repo.list
apt update && apt -y install openvpn-as
For Debian 9
apt update && apt -y install ca-certificates wget net-tools gnupg
wget -qO - https://as-repository.openvpn.net/as-repo-public.gpg | apt-key add -
echo "deb http://as-repository.openvpn.net/as/debian stretch main">/etc/apt/sources.list.d/openvpn-as-repo.list
apt update && apt -y install openvpn-as
After installing the package, an administration account is created called openvpn. However, no password has been set.
Set a password for the administrator’s account by typing:
sudo passwd openvpnNow, the command line configuration steps are complete. The rest of the guide will focus on configuring options through the web interface.
Accessing the Web Interface
We can access our VPN portal by going to our server’s IP address or domain name, at port 943. The server operates using TLS, so we will need to specify the https protocol.
For our initial interaction, we actually want to go to the administrative interface, which is the same, except ending with /admin:
https://server_ip_or_domain:943/admin
We can access our VPN portal by going to our server’s IP address or
domain name, at port 943. The server operates using TLS, so we will need
to specify the https protocol.
For our initial interaction, we actually want to go to the
administrative interface, which is the same, except ending with /admin:
https://server_ip_or_domain:943/admin
You will get a warning that the site’s SSL certificates are not trusted:
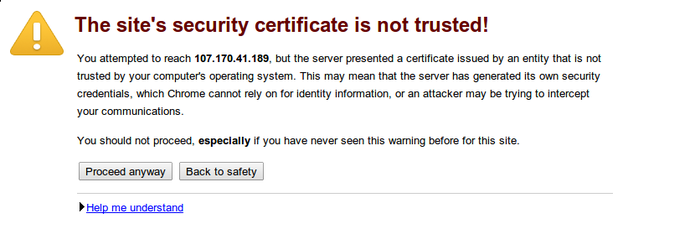
This is expected and perfectly fine. All that this is telling us is that OpenVPN is using a self-signed SSL certificate, which is not trusted by default by our browser. We can click on the “Proceed anyway” button or whatever similar option you have.
Note: If you are unable to connect to the web interface, there’s a chance that OpenVPN is bound to the wrong network interface. You can verify this by typing:
sudo netstat -plunt | grep openvpnIf the response does not show your server’s public IP address, you will need to manually reconfigure it by typing:
sudo /usr/local/openvpn_as/bin/ovpn-initDelete the current configuration by typing DELETE at the prompt. Next,
accept the license agreement and press ENTER to mark this as the primary
server. In the next prompt, select (1) all interfaces: 0.0.0.0 to bind
to all interfaces. This will ensure that the access server is available
in spite of a bind error in the OpenVPN installer. Press ENTER to accept
the default values of the remaining prompts.
After reconfiguring, you should be able to access the web interface after accepting the SSL certificate in your browser.
You will be presented with the admin login page. Use the username openvpn and the password you set for this user:

You will be taken to the OpenVPN Access Server’s EULA, which you will have to agree to if you wish to continue:

Once you log in, you can see the administrative interface, complete with some useful at-a-glance stats on the landing page:

Here, you can configure your VPN server. The access server separates the
web interface and the actual VPN access and each can be configured
independently.
For instance, if you go to the Server Network Settings in the left-hand
menu, you will see a page where you can configure the port and interface
that each component operates on. You can also specify the address pool
that will be available to the clients.
Another thing you might want to do is add users and configure the
authentication methods. You can add VPN users that match your system
users, or add users that you might be controlling through an LDAP
server.
Logging in as a Client
When you are finished configuring things as an admin, you can visit the
client portion by going to your IP address or domain name followed by
port 943:
https://server_ip_or_domain:943
You will have to type in a username of a user that you have configured VPN access for:

If you the user that you logged in as has been designated as an OpenVPN
admin account, you will see an “Admin” button that can be used to take
you back to the admin control panel. Either way, you will be taken to a
page that will allow you to download software for your client to connect
to the VPN server:

If your desktop is Windows or OS X, or if you have an android or iOS
device, you can download an OpenVPN Connect client that will operate
within your browser. If your desktop is a Linux machine, you will be
asked to download the normal VPN client.
You should follow the directions of the client of your choice. If you
are using the Linux client, you’ll need to download the connection
settings profile by clicking on the “Yourself” link:

Using the regular Linux openvpn client, you can connect using something like this:
sudo openvpn –config client.ovpn
Conclusion
Now, you should have a portal that can be used to configure your VPN access. This is an easy to manage interface that can be set up once and configured on-the-fly. It automatically generates valid configuration files for your users to connect to the server, which can save a lot of headaches with explaining how to configure access.
Connect Using your Android Device
You can download the openVPN application from google store : https://play.google.com/store/apps/details?id=net.openvpn.openvpn&hl=en
Connect Using your PC
To connect from your PC you will need https://openvpn.net/client-connect-vpn-for-windows/ the installation is easy and straight forward.

Comments
Thanks for sharing this!
Thannk for sharing this")
@systemfreaks bash: syntax error near unexpected token `;&'
Where do you get this error? which kernel ?
Remove all strings of amp; and gt;
thank you i will edit the post!! it seems to be a mistake that i didnt notice in the editor
Please paste in pastebin or something like that.
thes the forums editor is a bit messy, i will try paste bin on the next tutorial
openvpn or wireguard?
Great. Could you talk about how to setup machine to machine private network?
You mean what is better? i reall can'r tell
hello yes i will make one tutorial on soon
2 VPN connections allowed (currently in demo mode)Excellent tutorial
this is the problem with open vpn i will test wire guard as well and if it worth it i will create another tutorial
 ")
https://github.com/Nyr/openvpn-install
Doesn’t get any easier
insetting can i add the script on my blog ?
@Nyr
Of course you can!")
Helpful tutorial.
Thanks
I've been using this solution for some time.
https://lowendbox.com/blog/how-to-setup-openvpn-on-your-vps-ubuntu-18-04/
Nebula is another cool project for VPNs, I use it for a global private network on my stuff:
https://github.com/slackhq/nebula
Set up one public lighthouse server they all can reach, issue some certs, and bam - private network. It's a mesh too, data path isn't centralized
@Nyr can you make another script for Wireguard please? I always use this https://github.com/l-n-s/wireguard-install but it's unmaintained now
Will have news on this matter very soon.
check out https://github.com/finzzz/simple_wireguard
Yeah, been waiting for this! I hate to setup manually.
thx. but i prefer wireguard. easier to install and much faster.
I will make a guide for it as well")
thanks for the tutorial
The easiest way to setup OpenVPN/Wireguard is to use the french guy's script:
https://github.com/angristan/openvpn-install
https://github.com/angristan/wireguard-install
https://github.com/wg-dashboard/wg-dashboard wireguard setup + panel
https://getoutline.org/ is by far the easiest solution and most seamless, but it is owned by Alphabet Inc.
EDIT: It is fully open source and it has been audited by multiple independent parties.
https://github.com/Jigsaw-Code/?q=outline