


All new Registrations are manually reviewed and approved, so a short delay after registration may occur before your account becomes active.
Prestashop technical notes 1 — install Prestashop and Webmin

Introduction
Hosting your own eCommerce store in your own server provides a great number of benefits compared to shared hosting. Apart from the most obvious advantages such as privacy and security, another less discussed benefit is the flexibility when it comes to choosing an IP address. If you prefer a good IP address, you can purchase a VPS or a dedicated server from a reputable data center. The quality of the IP address plays a major role when it comes to web reputation of your domain and if you plan to host your own mail servers, not being in a blacklisted IP range helps a lot with mail delivery.
Prestashop is one of the best eCommerce management systems that is available for free and open source. When you combine Prestashop with Webmin, another free and open-source software, you get the ultimate web-based control over your server and the shop. In this tutorial, I will show you how to install and configure Webmin and Prestashop together and configure Nginx as the reverse proxy to the services.
Webmin
Webmin simplifies the process of Linux system management by using an intuitive web-based user interface. With a user interface, you can manage your configurations, databases, access levels, firewalls, and more in one place. This is extensible software, so you can always write your own modules to extend the functionality. In this step, we will see how to setup Webmin and configure the database for Prestashop.
Before installing Webmin, we can install certbot and obtain the SSL certificates.
apt install certbot
Now request the certificates.
certbot certonly -d <YOUR DOMAIN NAME>
Installing Webmin only takes a few steps. First, we add the Webmin repository to our Debian source list.
curl -o setup-repos.sh https://raw.githubusercontent.com/webmin/webmin/master/setup-repos.sh
sh setup-repos.sh
apt-get install webmin --install-recommends
Now Webmin is installed. Next, we will install Nginx and configure it to use Webmin.
apt install nginx
vim /etc/nginx/conf.d/webmin.conf
server {
server_name <Your Domain Name>;
# Enable SSL/TLS and HTTP2
listen 192.168.50.119:443 ssl http2;
# Point to files with SSL certificates for virtual host
ssl_certificate /etc/letsencrypt/live/<YOUR DOMAIN NAME>/fullchain.pem;
ssl_certificate_key /etc/letsencrypt/live/<YOUR DOMAIN NAME>/privkey.pem;
# Use only secure version of the TLS protocol (TLSv1.3)
ssl_protocols TLSv1.3;
ssl_prefer_server_ciphers on;
# Disable proxying for all /.well-known requests. It will
# only be useful, if a domain has "root" defined
location ^~ /.well-known/ {
try_files $uri /;
}
location / {
proxy_pass https://localhost:10000/;
proxy_http_version 1.1;
proxy_set_header Upgrade $http_upgrade;
proxy_set_header Connection Upgrade;
proxy_set_header Host $host;
proxy_buffering off;
proxy_request_buffering off;
client_max_body_size 64g;
}
}
Next, let’s do the necessary Webmin configurations. Open /etc/webmin/config and add the following line.
referers=webmin.example.com
Next, add the following lines to ‘/etc/webmin/miniserv.conf’.
redirect_ssl=1
redirect_host=webmin.example.com
Finally, add the following line to /etc/webmin/xterm/config and restart Webmin by running /etc/webmin/restart.
host=webmin.example.com
First test the Nginx configuration, and then reload the Nginx server to take effect of the configuration.
nginx -t
systemctl restart nginx
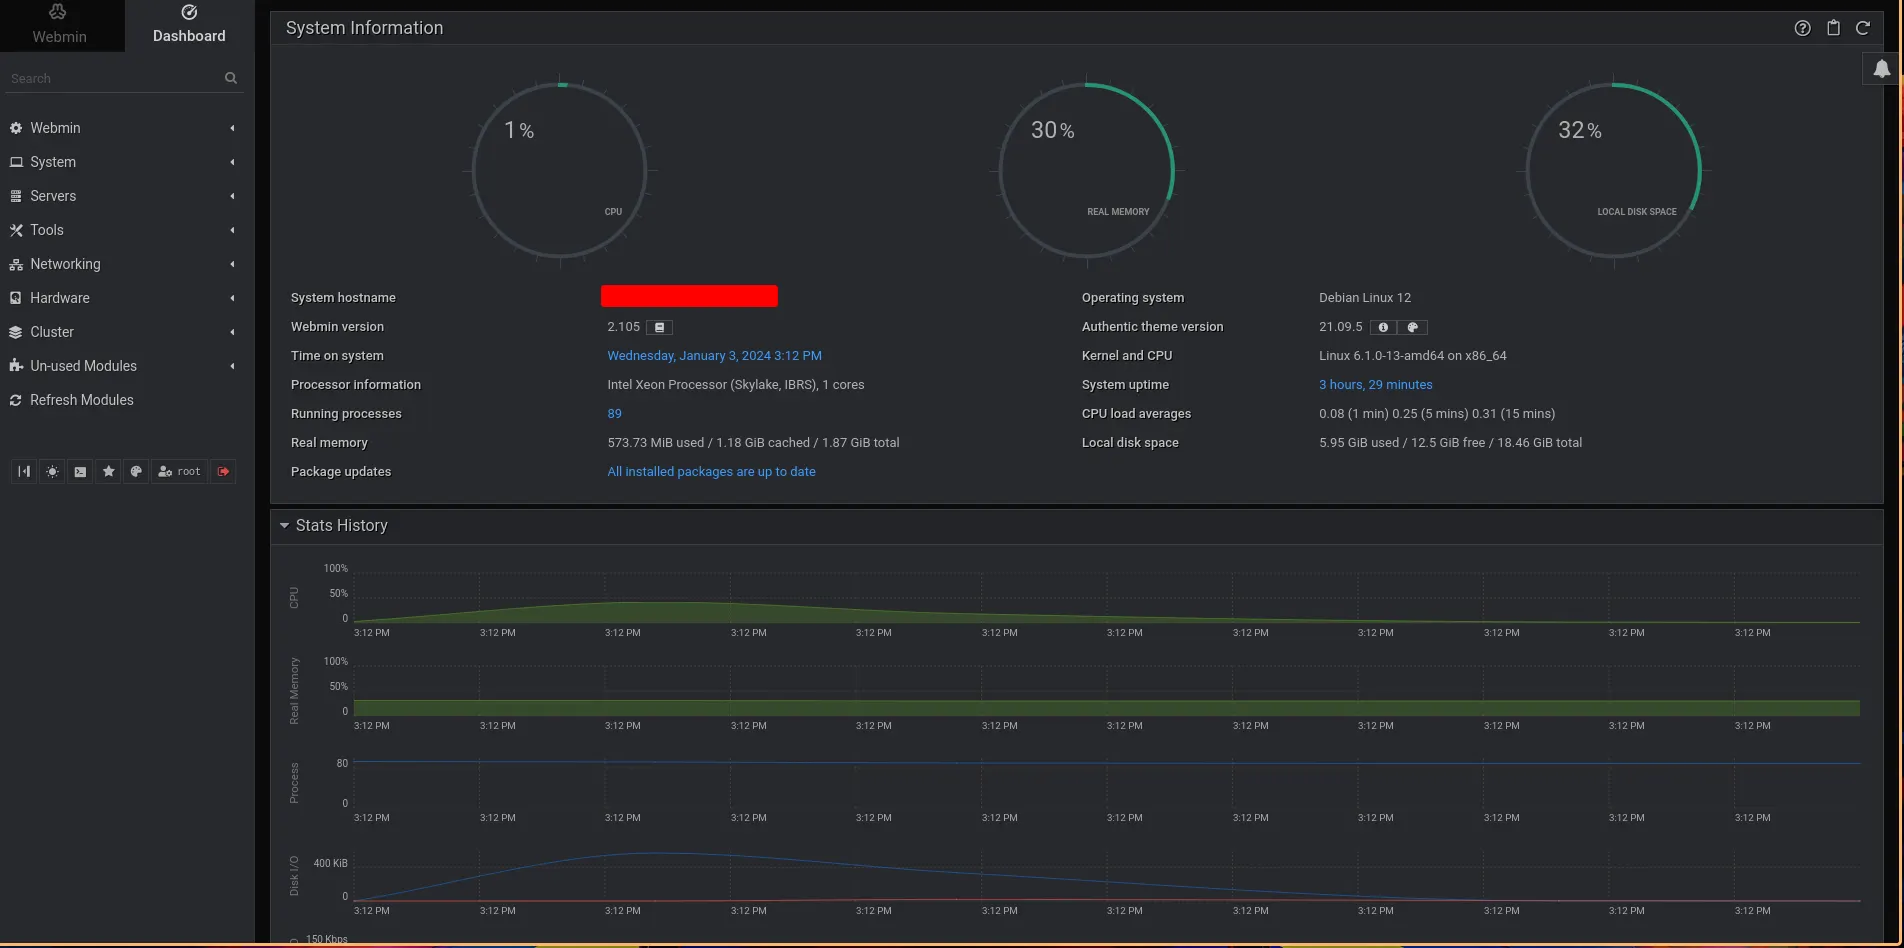
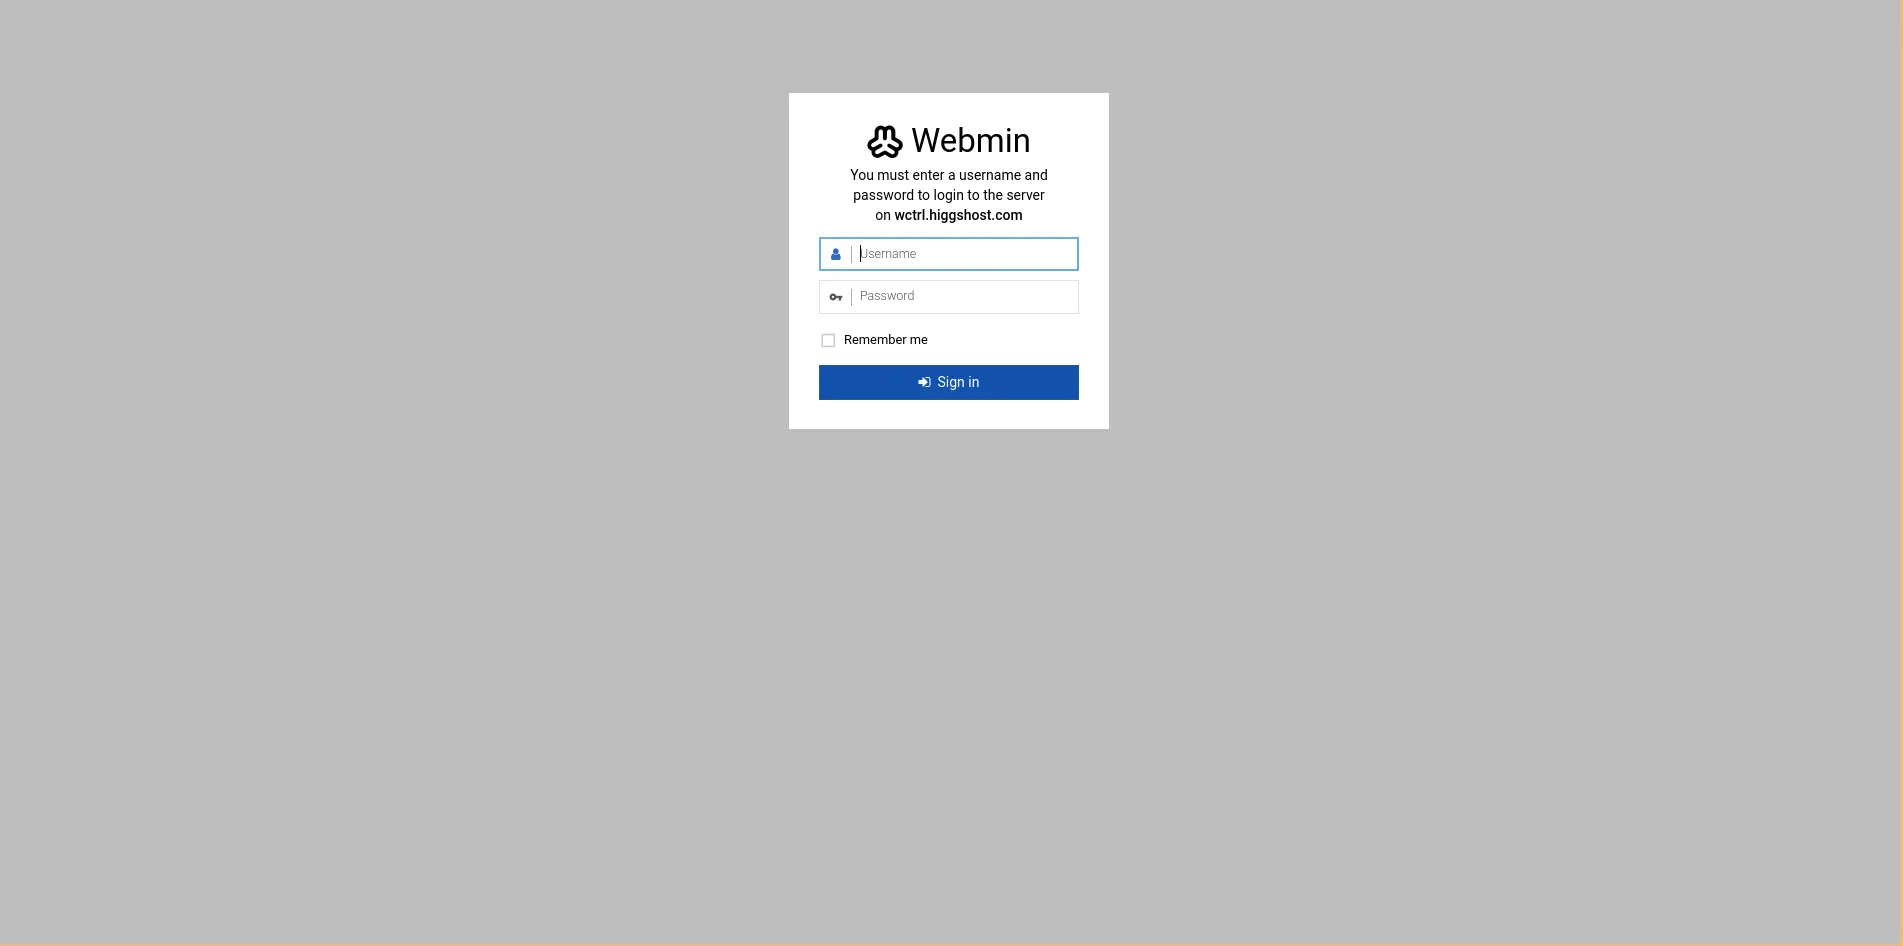
Once done, you can visit the domain name, and you will be greeted with a login page. Use the username root and the root password as the password, and login to the Webmin control panel.
Next, we should install MySQL on the server. I used Mariadb as my MySQL server, and to install Mariadb, run:
apt install mariadb-server
Once done, go back to the Webmin interface and click on “Refresh Modules” to automatically enable the Mariadb module in Webmin. When the module is activated, you will see the module under the server tab.
Inside the Mariadb Database Module, click on “User Permissions” to create a user for the Prestashop database.
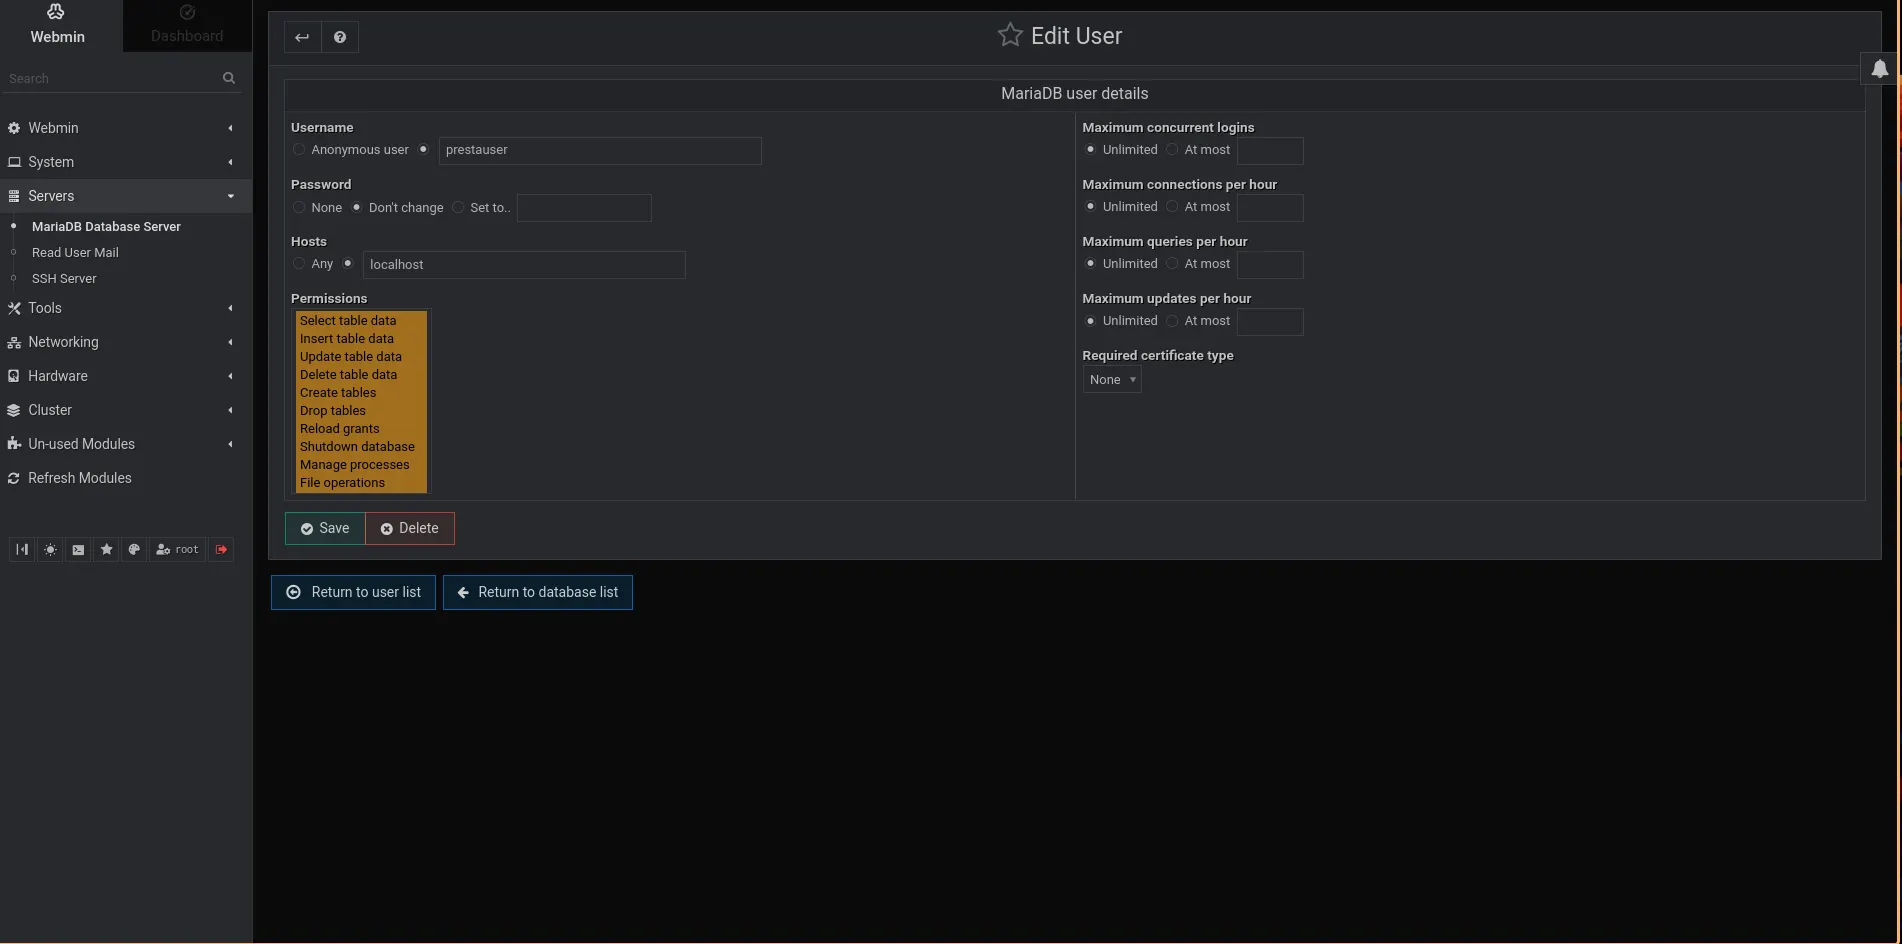
Here, make sure you select all the necessary permissions so Prestashop can create and populate the database during installation. After creating the user, next we should create an empty database for Prestashop.
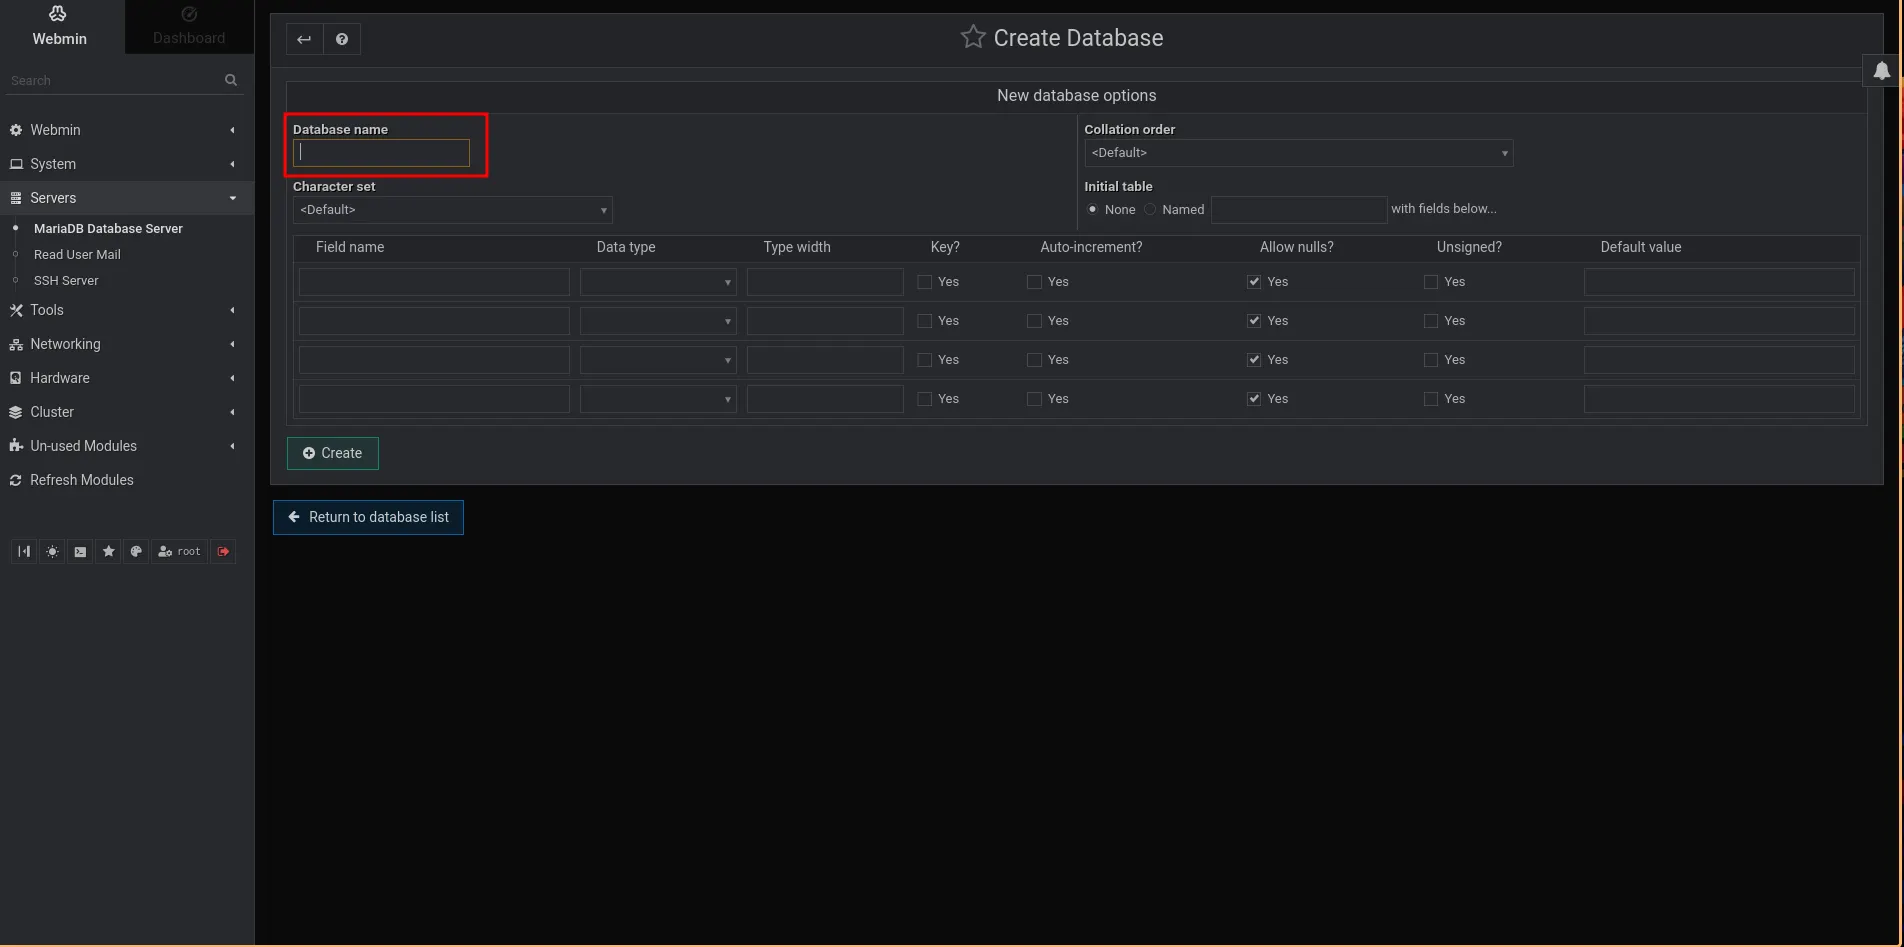
Go to the Mariadb module in Webmin and click on “Create a New Database.” Then give the database name and click on Create.
Our next step is to install Prestashop.
Prestashop
In order to install Prestashop, we first download the source code from github. You can download it using the following link:
https://github.com/PrestaShop/PrestaShop/releases
Once finished, copy the zip file to the server using scp or FTP. Next, create the folder /var/www/html/prestashop and unzip the file to the prestashop folder. There will be three files: php, html, and zip file. The unzipping of the zip file will be done by the installer.
Now we need a connection to the installer through the domain. For this, first setup a domain or subdomain for your shop and obtain the SSL certificates using certbot. When you request the certificates, make sure port 80 is not busy. You can stop the Nginx server if necessary.
With the SSL certificates ready, we do a simple Nginx configuration to connect to the web installer. For this, we will use php-fpm as the FastCGI process manager.
First, we install the necessary packages:
apt install php php-fpm
Then make sure PHP-FPM is up and running.
systemctl status php8.2-fpm
For the configuration, we first create the config file:
vim /etc/nginx/conf.d/shop.conf
and add the following configuration to it:
server {
listen 443 ssl;
server_name <YOUR DOMAIN NAME>;
root /var/www/html/presta;
index index.php;
# Point to files with SSL certificates for virtual host
ssl_certificate /etc/letsencrypt/live/<YOUR DOMAIN NAME>/fullchain.pem;
ssl_certificate_key /etc/letsencrypt/live/<YOUR DOMAIN NAME>/privkey.pem;
# Use only secure version of the TLS protocol (TLSv1.3)
ssl_protocols TLSv1.3;
ssl_prefer_server_ciphers on;
location / {
try_files $uri $uri/ /index.php$is_args$args;
}
location ~ \.php$ {
fastcgi_split_path_info ^(.+\.php)(/.+)$;
fastcgi_pass unix:/run/php/php-fpm.sock;
fastcgi_index index.php;
include fastcgi.conf;
}
}
Then we test and load the configuration to take effect.
nginx -t
systemctl reload nginx
Now, when you visit the installation page, you will be greeted and shown if any dependencies are missing.
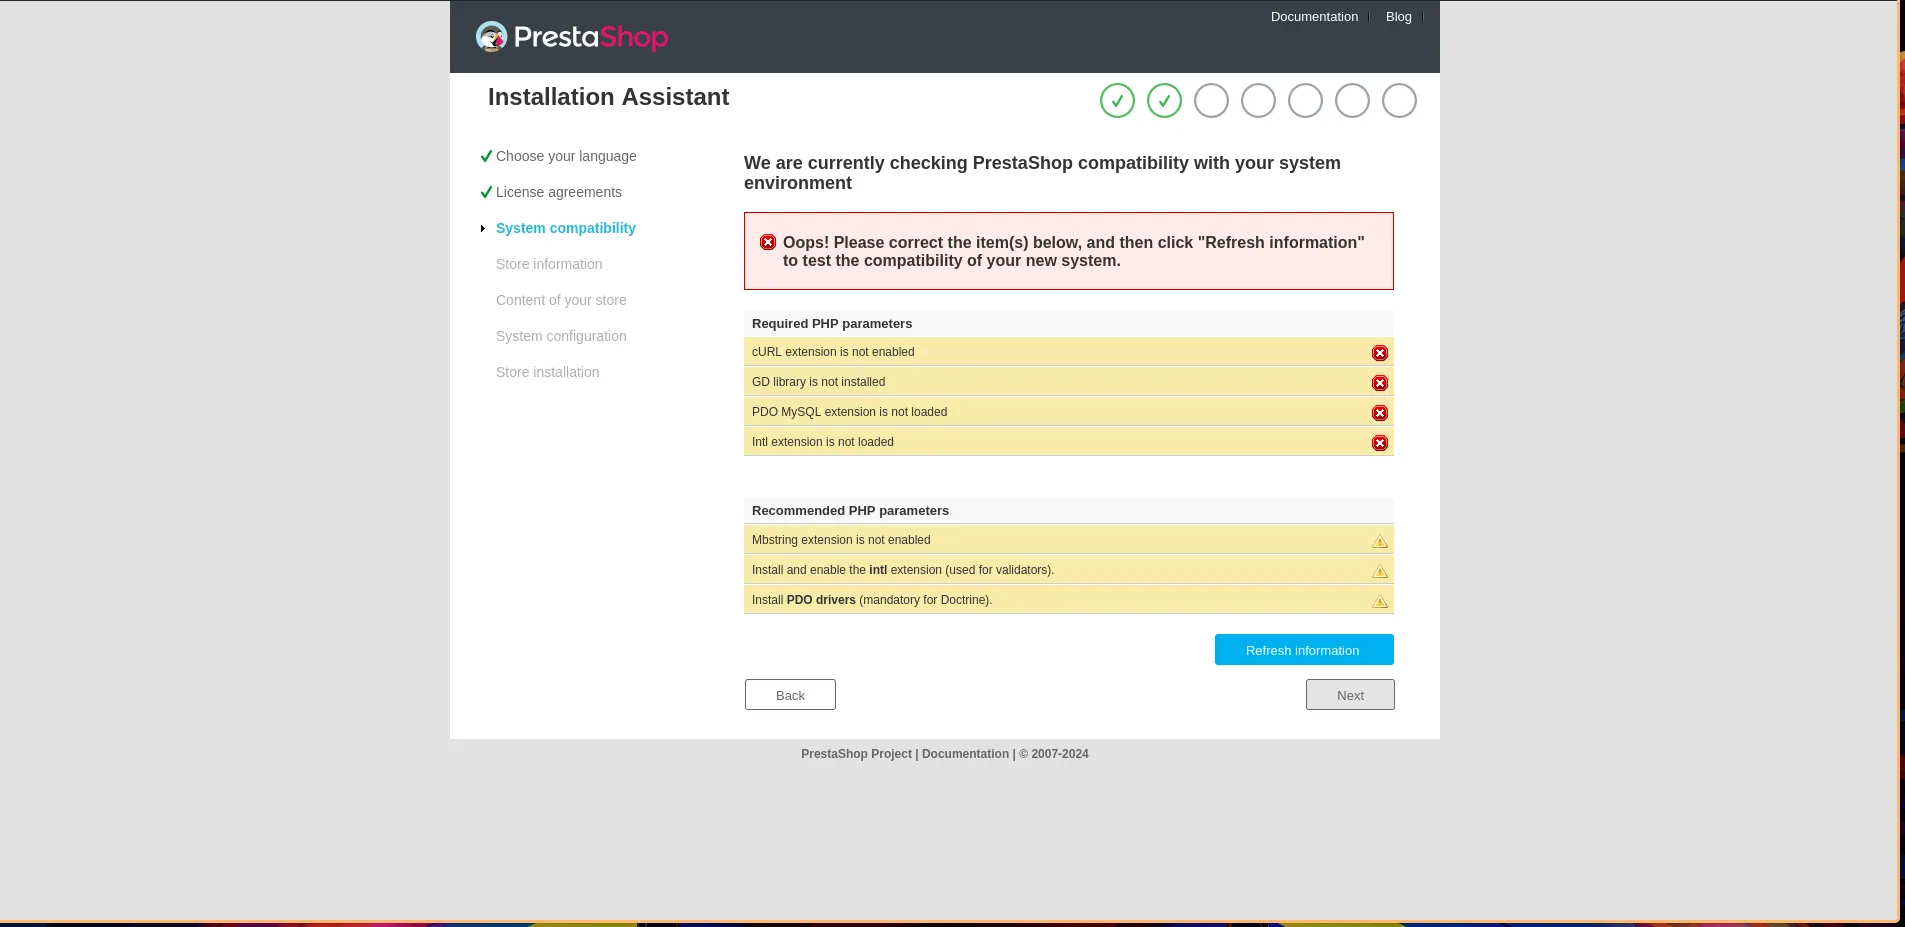
Naturally, we must install these dependencies to proceed forward. In order to install them, run the following command:
apt install php-curl php-gd php-mysql php-intl php-mbstring
Any php extension can be found using the php- prefix and then the extension name. So if you have a different set of dependencies, you can install them using the naming rule.
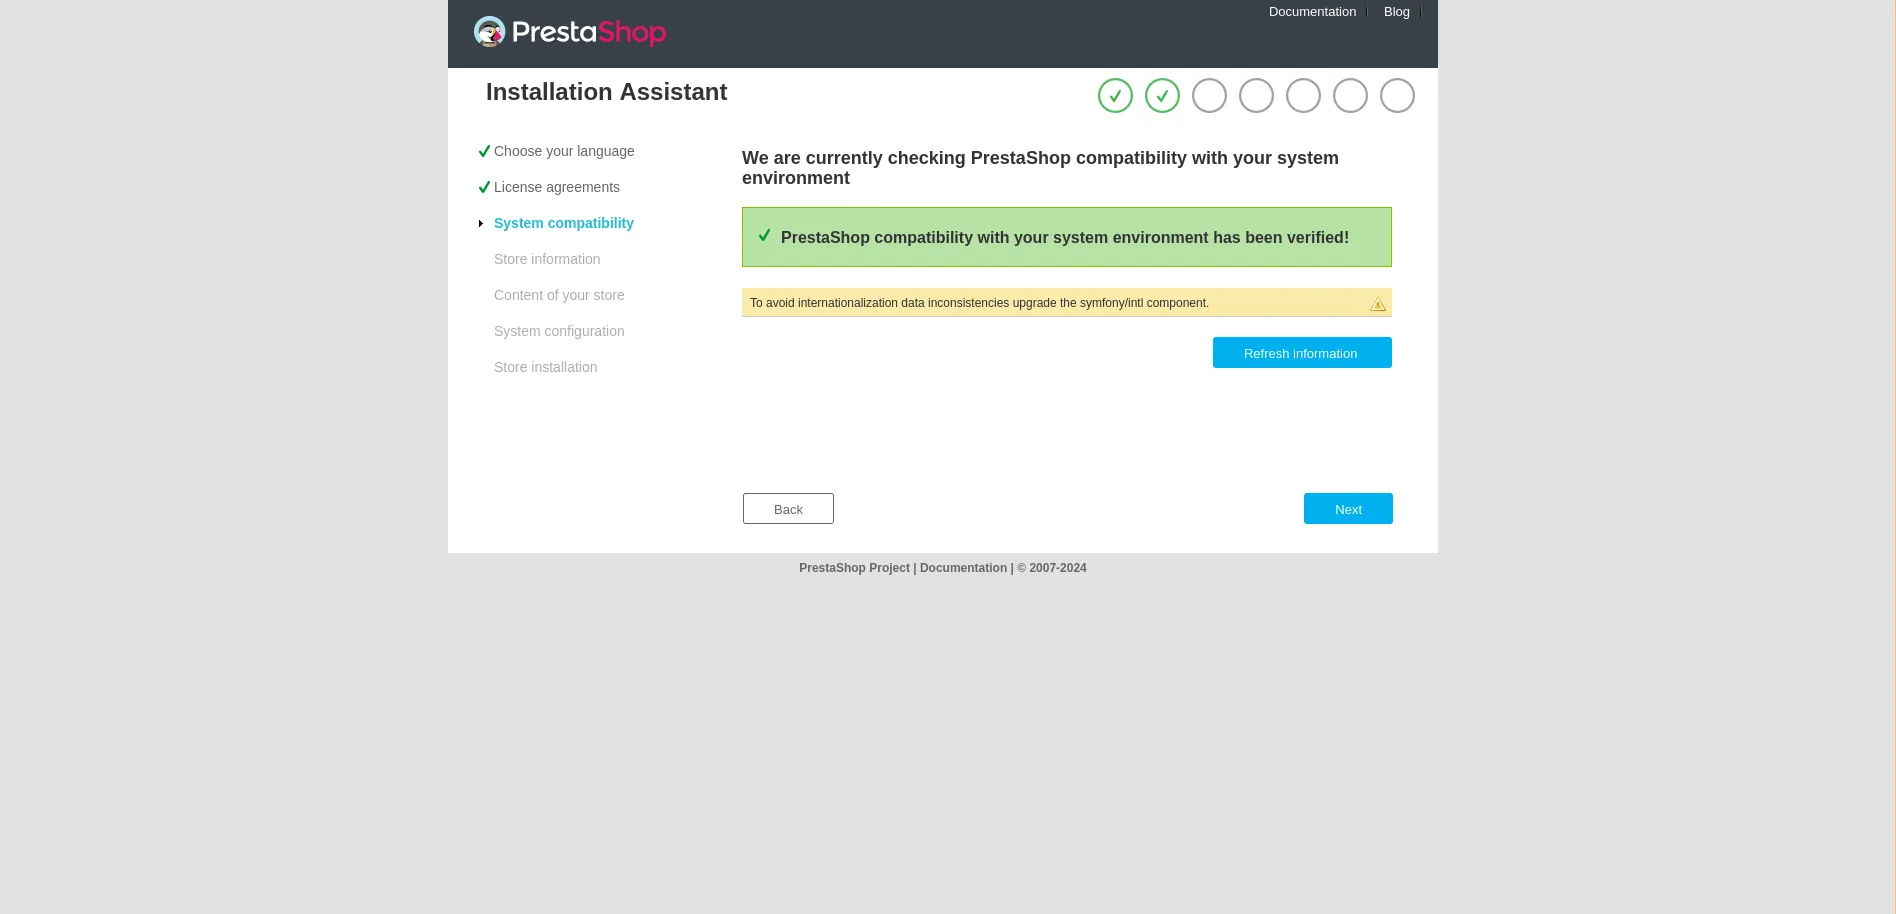
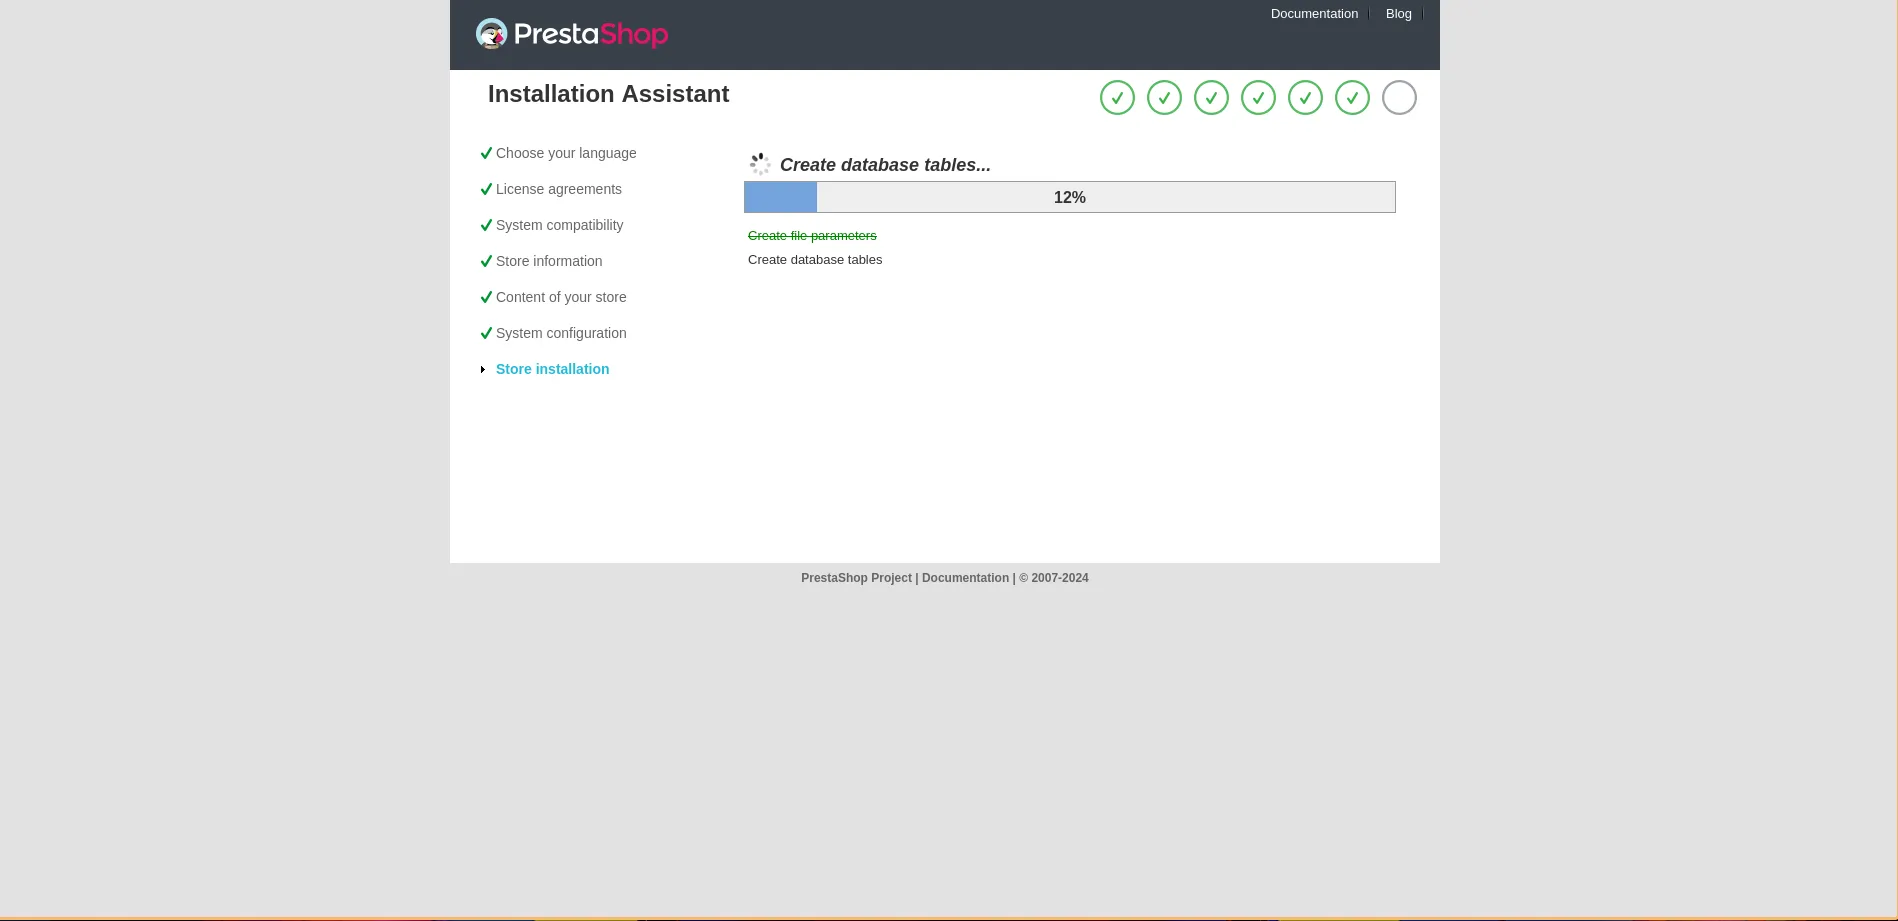
Once everything is set, you will see a confirmation, and you can proceed further with the installation.
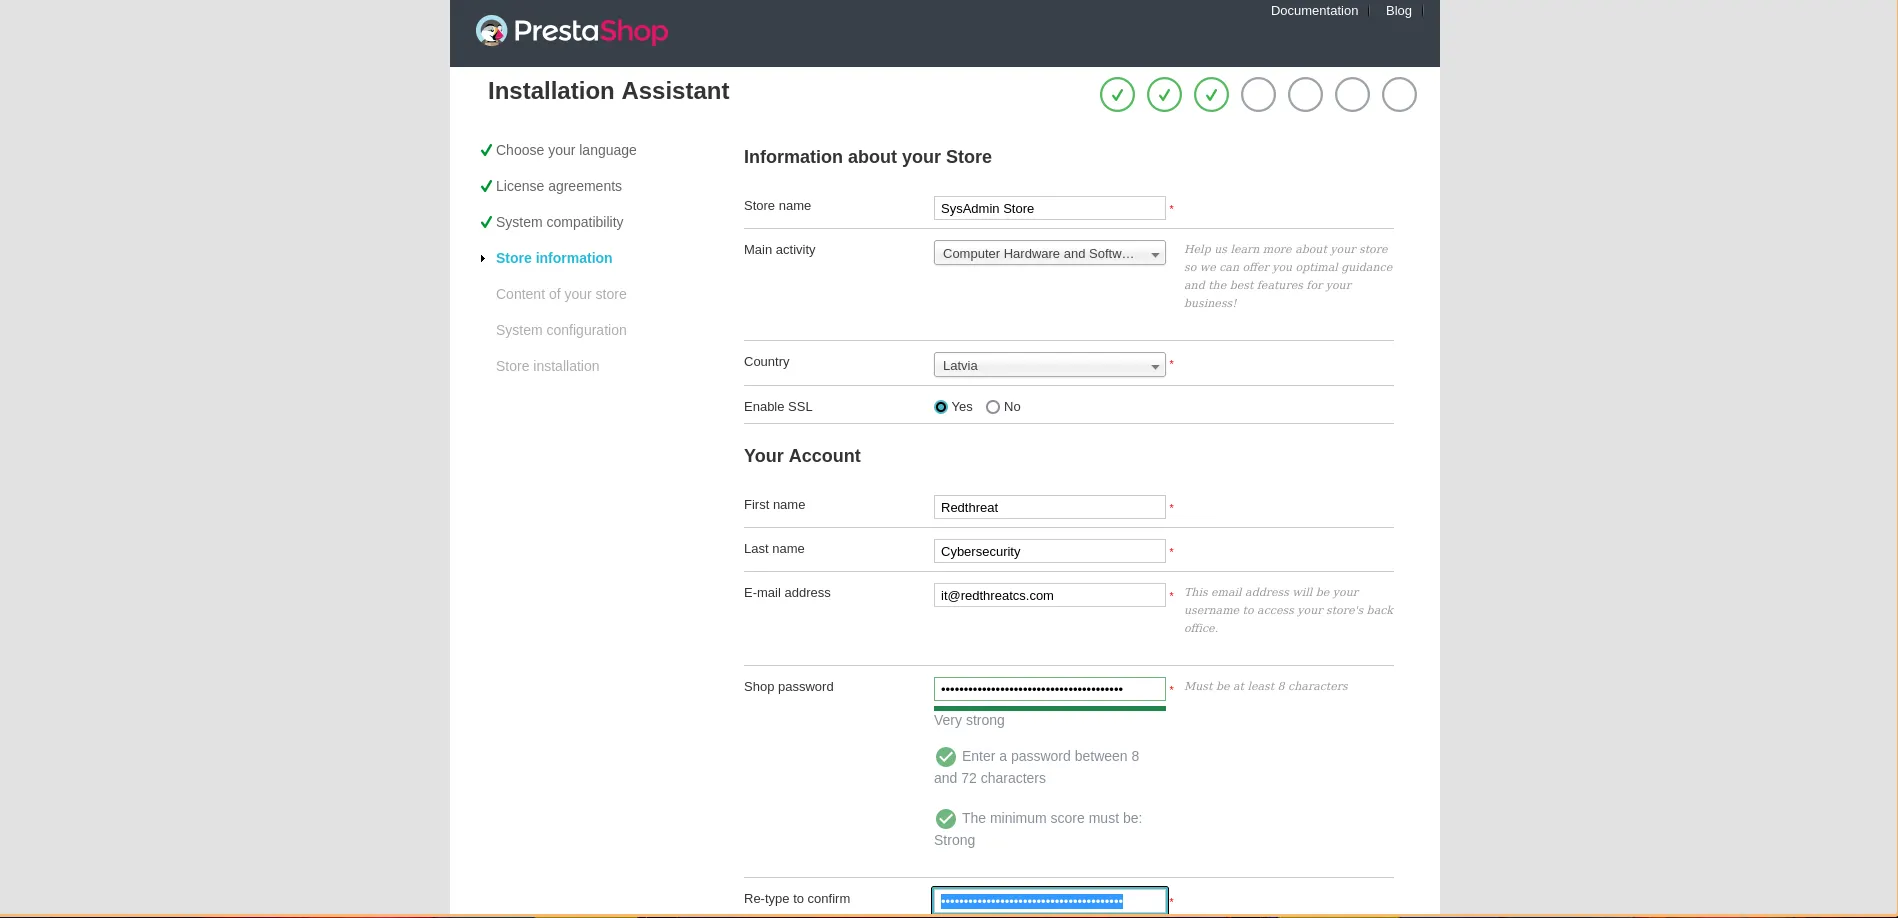
Next, give your store details. To login to the backend, it will use the email address that you give here, so make sure you remember the email address together with the password.
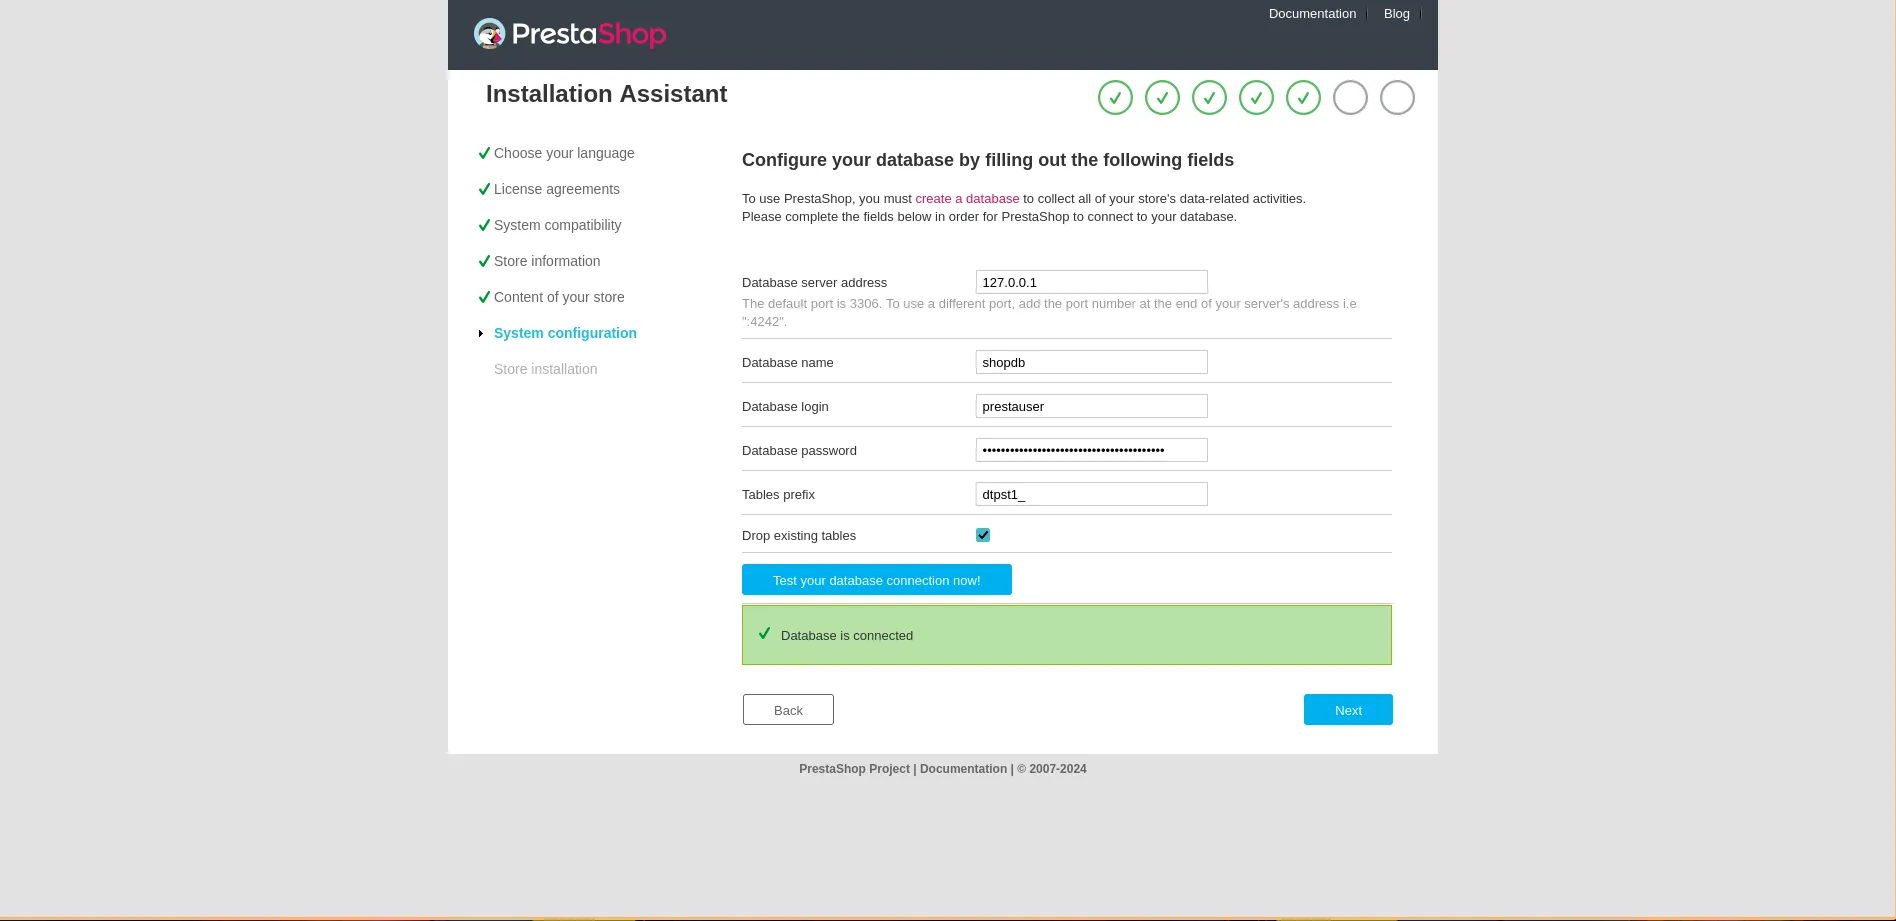
Once you finish configuring the store, you will come to a point where the installer asks for database details. Here, give the database name, user, and password that you have created using Webmin. When you test the database connectivity, you will get a verification.
Finally, once everything is in order, the installer will start installing Prestashop.
After a successful installation, you will be greeted with a page containing a link to the frontend and a login link to the backend. Before you login, make sure you remove the install folder. For that, run the following command:
rm -rf /var/www/html/prestashop/install
In case you cannot find the admin page, you can check the admin folder name from the terminal:
ls /var/www/html/prestashop
There will be a folder with a name starting with admin, followed by a random set of characters. So to login, simply go to.
https://<YOUR DOMAIN NAME>/admin564rn224bgdrletvfw23veb

Since Prestashop is installed, we will now update the Nginx configuration to serve Prestashop properly. For configuration, first open the configuration file:
vim /etc/nginx/conf.d/shop.conf
and add content to the following link:
https://devdocs.prestashop-project.org/8/basics/installation/advanced/nginx/
Finally, test the Nginx and reload the configuration.
nginx -t
systemctl reload nginx
Now go ahead and login to the backend and continue configuring your eCommerce store. In the next article, I will explain how to improve the security of your server and set up automated cloud backups.
Originally posted at: https://medium.com/@redthreatcs/prestashop-technical-notes-1-install-prestashop-and-webmin-07bf2b88fe7f

Comments
I can’t tell if this is an ad for your company or if it’s legitimate (organic) content.
It is spam. At the end of this is link to original.
Well this is not an ad, simply to teach people how to host stuff themself (We are not involve in hosting business, only Cybersecurity). Also not a spam. The medium post is also by myself.
"Not an ad" but still inserts your own product site. Pretty pointless to install webmin if your only purpose for the server is a prestashop site. The latest LTS Ubuntu comes with PHP 8.1, not 8.2 (unless you've explicitly enabled ondrej's repo, which I don't see). The php fpm socket path doesn't seem right either, should be php8.1-fpm.sock unless you've created a symlink. The people who may need this tutorial should probably just use cpanel and 1-click install it from softaculous.

Your entire tutorial is just a generic "install LNMP stack" that doesn't provide much value at all and promotes your site at the end.
Hey, thanks for the input. The purpose of this tutorial is to promote Free and Open Source stack to people who wish to host their things themself. Sure this is a beginner article and I am planning to advance step at a time to show how to further secure the infrastructure themself (To a certain level because there is no 100% security). The thing is I see many starters take security lightly and at the same time not funded enough to outsource it.
I should have mentioned that it is a Debian 12 VPS. I could have used Ubuntu but it is a bit bloated with Canonical stuff in my opinion.
BTW. its just a demo shop, the VPS is down already.
LowEndLearnings
it's called linkbuilding